I am, coincidentally enough, actually wearing this shirt today. I love it. I'm crazy about it. I love the design, I love how light and airy it is, and I love the pure comfort of the shirt. I have another T-shirt that I altered in this fashion, but I never made a DIY out of it. I'm glad I decided to take the approach to this shirt. I bought the shirt from The Yeetee, thanks to help from Kaitlin "Pwnlove" Stewart. In case you didn't know, she runs an excellent video game fashion blog.
The first step was cutting off the sleeves. I cut off the sleeves right against the seam, so that the entire seam and sleeve is removed from the body of the shirt.
I then cut a straight line across the top! I measured down to make sure the ends were even, but allowed the center to be a little wobbly--it's going to be hemmed down, anyway.
I then used a tight zig-zag stitch to secure the t-shirt around the armholes. This keeps the jersey material from fraying too much, even though it usually does so naturally. The zig-zag stitch secures it after multiple washings.
Then you go back and fold over the hem, with about 1/2 inch allowance. You're going to need space to maneuver a little bit, here!
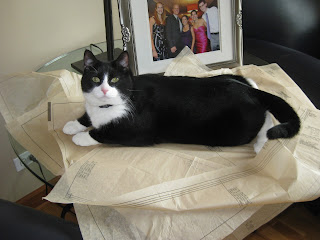
Pause again to yell at the cat for dragging a piece of the pattern down to the floor to sit on. Naughty kitty!
Then you take your ribbon, and hem the ends so they're secure and won't fray after washing (you should probably also make sure it's machine washable, unless you want to re-thread the ribbon after each washing). Then put a safety pin through one end, and guide the ribbon through the front of the shirt. Turn it so that it naturally flows across the back of the shirt, as well. This means that each end of the ribbon should be on one side of the shirt! Once you've got this step down, then tie the ends together to bring the (adjustable) neckline together!
Here's a close-up of the neck line.
And here's the whole shirt! (These things turn out so much better when there's someone else around to take pictures.)
What do you think? I, personally, love the shirt. I feel like a five-year-old who wants to wear the same thing every day. Let me know what you think in the comments!
Links to My Other Shirt Alteration DIYs:
Tank Dress
Tube Top


Yeah,I think that's one of my favorite shirt-mods you've done. Prolly because I'm a fan of halter tops and I think they look really good on you. ;)
ReplyDeleteThanks! Is it technically a halter top, though? Since it has a full back? I do not know the answer to this question :(
DeleteDoes it look the same on the back as on the front? I love what you do with your shirts!!! Cant wait to try it with some of my new geek shirts.
ReplyDeleteThanks so much! The shirt looks exactly the same in the back as it does in the front. Of course, with the shape of your body the neckline tends to come out less curved than it is in the front.
Delete